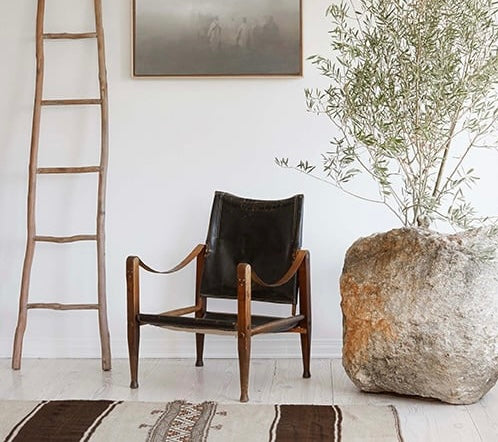
Gardening enthusiasts, rejoice! Hypertufa planters are a fantastic way to add a touch of rustic charm to your garden or home while showcasing your favorite plants. These DIY planters are not only cost-effective but also allow for endless customization. In this guide, we’ll walk you through the process of making hypertufa planters and provide you with a simple recipe to get started.
What is Hypertufa?
Hypertufa is a versatile, lightweight, and durable material that mimics the appearance of natural tufa rock, commonly used in alpine gardening. It’s composed of a mix of Portland cement, peat moss, and perlite (or vermiculite). The result? Beautiful, textured containers perfect for planting succulents, herbs, or any plant of your choice.
Materials You’ll Need:
• Portland Cement: Available at most hardware stores.
• Peat Moss: Easily found at garden centers.
• Perlite or Vermiculite: Adds texture and reduces weight.
• Water: For mixing the ingredients.
• Rubber Gloves: To protect your hands from cement.
• A Mold or Container: This will determine the shape of your planter.
• Cooking Spray or Vegetable Oil: For coating the mold.
• Plastic Sheet or Trash Bags: To cover and cure your planters.
• Optional: Decorative additives like small stones or moss.
Recipe Instructions:
Note: Hypertufa can be messy, so it’s a good idea to work outdoors or in a well-ventilated area.
Step 1: Safety First
Before you begin, put on your rubber gloves to protect your hands from the cement.
Step 2: Prepare Your Mold
Choose your mold or container. It can be any shape you desire, from simple bowls to complex designs. Coat the inside of the mold with cooking spray or vegetable oil. This will help release the hypertufa planter once it’s set.
Step 3: Mix the Hypertufa
In a large container or wheelbarrow, mix the following ingredients in the specified proportions:
• 1 part Portland cement
• 1.5 parts peat moss
• 1.5 parts perlite or vermiculite
Add water gradually and mix until you achieve a consistency similar to oatmeal. It should hold its shape when squeezed but not be too wet.
Step 4: Mold Your Planter
Scoop the hypertufa mix into your prepared mold. Press it firmly into the mold, making sure to create an even thickness for the walls of your planter. Use your hands or a trowel to smooth the surface and shape the rim.
Step 5: Create Drainage Holes
If you plan to use your hypertufa planter for outdoor plants, consider adding drainage holes. Insert a straw or dowel into the bottom of the planter to create holes.
Step 6: Cure and Dry
Cover your planter with a plastic sheet or trash bag to slow the drying process. Leave it in a cool, shaded area for at least 48 hours or until it’s completely dry and no longer feels cool to the touch.
Step 7: Unmold and Finish
Once your planter is fully cured and dry, carefully remove it from the mold. If you encounter resistance, gently tap the sides of the mold. Let it air dry for a few more days to ensure all moisture has evaporated.
Step 8: Add Personal Touches
Now, it’s time to get creative! You can leave your hypertufa planter as is for a natural look, or you can paint it, add decorative stones, or even let moss grow on it for a more aged appearance.
Step 9: Plant Your Favorites
Once your planter is decorated and ready, fill it with potting soil and plant your favorite flowers, succulents, or herbs.
Congratulations! You’ve successfully crafted your very own hypertufa planter. These unique and rustic containers are not only functional but also add a personalized touch to your garden or home decor. Enjoy watching your plants thrive in their new, handmade homes.
